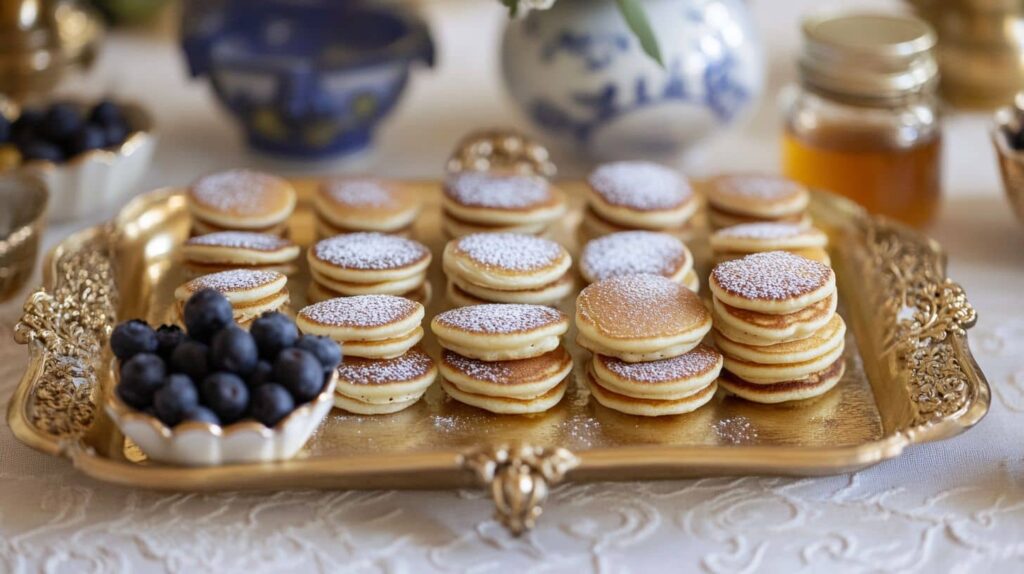
Hey there! Ever wondered how something as simple as pancakes could get even more fun and exciting? 🎉 Well, get ready because we’re about to shrink the classic pancake down to something even more adorable and delightful: mini pancakes! Whether you’re throwing a breakfast bash, wanting a cute snack, or setting up a sweet party platter, these tiny treats are perfect. They’re not just easy to make but are so fun to eat and serve. So, if you’re ready to become a mini pancake master, stick with me through this yummy journey!
Table of Contents
What are Mini Pancakes?
Mini pancakes, also known as silver dollar pancakes, are your beloved fluffy pancakes made tiny. Think about the size of a cookie—perfect for a one-bite adventure! They’re excellent for stacking high, dipping in a variety of sauces, or popping straight into your mouth. They bring the same joy as regular pancakes but are just right for someone who loves everything mini.
Why Mini Pancakes are a Great Choice
Why go mini? These pancakes are more than just a cute novelty; they’re incredibly versatile and practical. Imagine having a brunch where everyone gets to try all sorts of toppings without getting too full. Or think about a birthday party—these pancakes are perfect for little hands and can be customized to fit any theme. They’re also a hit for meal prep. Make a big batch, freeze them, and you’ve got a quick breakfast ready in minutes during those busy mornings.
Mini pancakes also make eating more interactive and enjoyable. You can set up a mini pancake bar with different syrups, fruits, nuts, and spreads, letting your friends and family build their dream pancake stack. It’s not just about eating; it’s about creating fun memories around food.
Essential Ingredients for Mini Pancakes
Let’s make sure your pantry is stocked! Here’s everything you need to start making those scrumptious mini pancakes:
| Ingredient | Quantity |
|---|---|
| All-purpose flour | 1 cup |
| Granulated sugar | 2 tablespoons |
| Baking powder | 1 teaspoon |
| Salt | 1/4 teaspoon |
| Milk | 1 cup |
| Unsalted butter (melted) | 2 tablespoons |
| Egg | 1 large |
These ingredients are the classic foundation for your pancake batter, but don’t be afraid to tweak them. For example, if you’re avoiding dairy, swap in your favorite plant-based milk. Or, if you’re cutting down on sugar, you might try a substitute like honey or maple syrup for a different kind of sweetness.
“Remember, the key to perfect mini pancakes lies in the batter. Not too thick, not too runny—just right!”
Equipment Needed: Making Mini Pancakes
Just as a painter needs a brush, a mini pancake chef needs the right tools. Here’s what will make your pancake making a breeze:
- Mini pancake pan: This special pan has multiple small wells perfect for creating uniform mini pancakes. If you don’t have one, you can still use a regular non-stick skillet and drop small amounts of batter, but for true mini pancake enthusiasts, a mini pancake pan is a game changer.
- Mixing bowls: At least two, for mixing dry and wet ingredients separately before combining them.
- Whisk: Essential for beating your eggs and ensuring your batter is smooth without lumps.
- Ladle or small scoop: This helps you pour just the right amount of batter into the pan, keeping your pancakes uniformly mini.
- Spatula: A thin-edged spatula is key for flipping those tiny pancakes easily and effectively without causing a pancake catastrophe.
With all your ingredients and tools at the ready, you’re all set to dive into the world of mini pancakes. In the next section, we’ll go step-by-step through the process, from batter mixing to pancake flipping, ensuring you get the perfect mini pancakes every time. So, grab your apron, and let’s get cooking!
Step-by-Step Guide to Making Mini Pancakes
Alright, let’s get to the fun part—making those mini pancakes! Follow these steps carefully, and you’ll be flipping the cutest pancakes in no time.
Preparing the Batter: Making Mini Pancakes
First things first: the batter. This is where all your fluffy pancake dreams start. To make sure yours turns out just right, follow these tips:
- Mix the Dry Ingredients: In one of your mixing bowls, whisk together the flour, sugar, baking powder, and salt. Make sure they’re well combined and free from clumps.
- Combine the Wet Ingredients: In another bowl, whisk the egg, milk, and melted butter until it’s a smooth mixture.
- Merge Wet and Dry: Pour the wet mixture into the dry ingredients. Stir gently with a whisk or a spoon until just combined. Remember, a few lumps are okay—overmixing will make your pancakes tough.
Once your batter is mixed, let it sit for about five minutes. This allows the baking powder to activate, making your pancakes fluffy and light.
Cooking Your Mini Pancakes
Now for the exciting part—cooking! Here’s how to ensure perfect mini pancakes every batch:
- Heat Your Pan: Preheat your mini pancake pan or non-stick skillet over medium heat. A little butter or oil helps prevent sticking and adds a nice flavor.
- Pour the Batter: Use a small scoop or a tablespoon to pour the batter into the pan, filling each well about three-quarters full. This helps keep the pancakes uniform in size and shape.
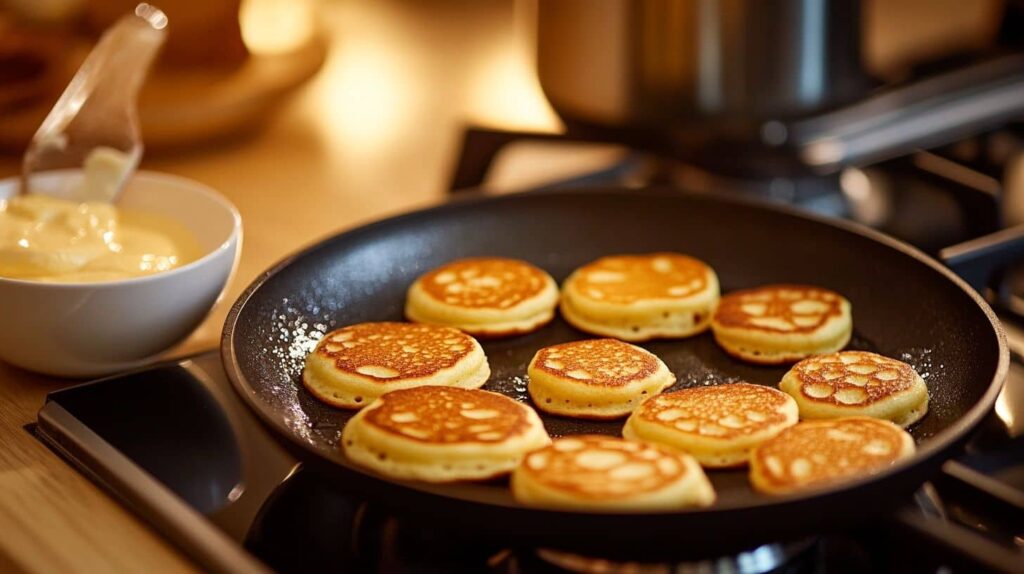
- Cook and Flip: When you see bubbles forming on the surface and the edges look set, it’s time to flip! Use your thin-edged spatula to gently turn each pancake. They should be golden brown on both sides and cooked through.
- Repeat: Continue with the rest of the batter, adjusting the heat if necessary to prevent burning. Don’t forget to add a little more butter or oil as needed between batches.
Voila! Your mini pancakes should now be ready to stack and serve. But before you do, let’s explore some ways to spice them up.

Variations of Mini Pancakes: Making Mini Pancakes
Plain mini pancakes are great, but why not mix it up a bit? Here are some delicious variations to try:
- Gluten-Free Mini Pancakes: Swap out the all-purpose flour for your favorite gluten-free blend. Just make sure it’s one that can be used 1:1 for regular flour.
- Vegan Mini Pancakes: Use plant-based milk, a flax egg (1 tablespoon ground flaxseed mixed with 3 tablespoons water), and vegan butter or oil.
- Add-Ins: Sprinkle in some blueberries, chocolate chips, or chopped nuts right into the batter for an extra tasty treat.
Common Problems and Solutions: Making Mini Pancakes
Encountering issues? No worries, here are some tips to help:
- Batter Too Thick or Too Runny: If your batter is too thick, add a bit more milk. Too runny? Add a spoonful of flour. Adjust gradually until you get the right consistency.
- Pancakes Not Cooking Evenly: Make sure your pan is properly preheated and adjust your stove’s heat setting. A consistent medium-low heat typically works best.
- Pancakes Sticking to the Pan: Even with non-stick pans, a bit of butter or oil goes a long way. Also, make sure your pan is hot enough before pouring in the batter.
With these tips and tricks, you’re well on your way to becoming a mini pancake pro. In the next part, we’ll talk about serving, storing, and reheating your mini pancakes, so stay tuned for more fun tips and ideas! 😊
Serving and Presentation Ideas: Making Mini Pancakes
Now that you’ve mastered the art of making mini pancakes, let’s talk about the fun part—serving them! Mini pancakes are versatile, and there are countless ways to make them a hit at any table.
Topping Ideas for Mini Pancakes: Making Mini Pancakes
One of the best things about mini pancakes is the endless variety of toppings you can use to dress them up. Here are some favorites:
- Classic Syrup: You can never go wrong with good old maple syrup. Drizzle it over your stack for a sweet and sticky finish.
- Fresh Fruits: Top your pancakes with slices of banana, fresh berries, or chopped apple for a refreshing twist.
- Nut Butters: Spread a little almond butter or peanut butter on each pancake for a protein-packed topping.
- Whipped Cream: A dollop of whipped cream and a sprinkle of chocolate shavings can turn your mini pancakes into a decadent treat.
- Yogurt and Honey: For a healthier option, top your pancakes with a spoonful of Greek yogurt and a drizzle of honey.
Creative Ways to Serve Mini Pancakes: Making Mini Pancakes
Think beyond the plate! Here are some creative ideas:
- Pancake Skewers: Thread three or four pancakes onto skewers with pieces of fruit in between each one for a fun and portable snack.
- Pancake Tacos: Fold mini pancakes in half and fill them with whipped cream and berries to make tiny taco-shaped treats.
- Mini Pancake Sliders: Use two pancakes as the “buns” and fill them with your favorite spreads or a slice of banana.
How to Store and Reheat Mini Pancakes
Mini pancakes aren’t just for immediate consumption; they can also be stored for later. Here’s how to keep them fresh:
Storing Leftovers: Making Mini Pancakes
If you find yourself with leftover mini pancakes, don’t worry—they store beautifully. Just let them cool completely, then layer them between sheets of wax paper in an airtight container. They’ll stay fresh in the refrigerator for up to five days or in the freezer for up to two months.
Best Reheating Techniques: Making Mini Pancakes
When you’re ready to enjoy your mini pancakes again, reheating them properly can make them just as delicious as when they were fresh. Here are the best methods:
- Toaster: Pop them in the toaster for a quick and easy heat-up. This method helps them stay crispy on the outside.
- Oven: Preheat your oven to 350 degrees Fahrenheit and place the pancakes on a baking sheet. Cover them with foil and heat for about 10 minutes. This is great for larger batches.
- Microwave: For a super quick option, microwave them on high for about 30 seconds. Just be careful not to overdo it, or they’ll get tough.

Conclusion
There you have it—everything you need to know about making, serving, and storing mini pancakes. They’re not only a delicious treat but also a fun way to bring creativity and joy to your cooking. Whether for a special occasion or a delightful family breakfast, mini pancakes are sure to impress. So, why not give them a try this weekend?
Encouraging Reader Engagement
Have you tried making mini pancakes? Do you have a favorite topping or a unique serving idea? Share your experiences and photos with us! We love seeing how creative you can get with your pancake creations. Happy cooking!
